Hello :)
This week I changed the way I structure the project files related to my website solutions and wanted to write a bit about the way I accomplished the change because I think it can get to be confusing.
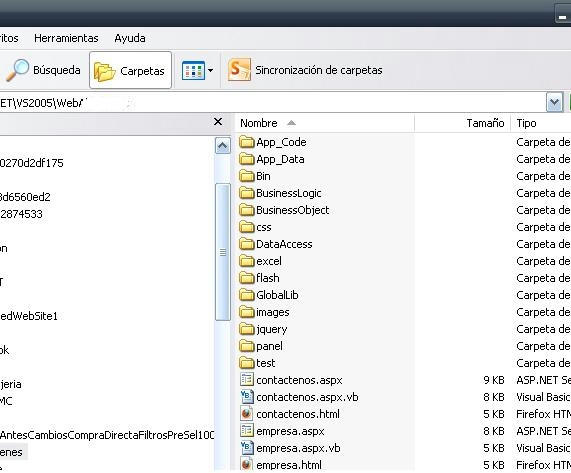
I used to structure my solutions creating a new website project and once that was done I put the other project folders (Different Layers, Helper Projects, Test Projects, etc) all within the main Website project folder:
This week I changed the way I structure the project files related to my website solutions and wanted to write a bit about the way I accomplished the change because I think it can get to be confusing.
I used to structure my solutions creating a new website project and once that was done I put the other project folders (Different Layers, Helper Projects, Test Projects, etc) all within the main Website project folder:
Image may be NSFW.
Clik here to view.
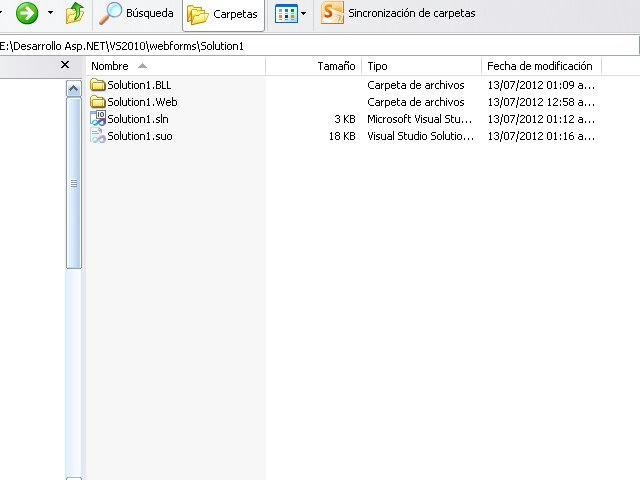
Then I realized that it was better if I created a solution file contained in a Main Solution folder and from there each member of the project (website, each layer project, test projects, etc) get to be added to the main container having a separate folder containing their particular files:
Clik here to view.
Then I realized that it was better if I created a solution file contained in a Main Solution folder and from there each member of the project (website, each layer project, test projects, etc) get to be added to the main container having a separate folder containing their particular files:
Image may be NSFW.
Clik here to view.
Clik here to view.
This structure gives a better control because the concerns of the application are being separated not only for development but also in the physical containers of each member composing it.
The steps to accomplish this go as follows:
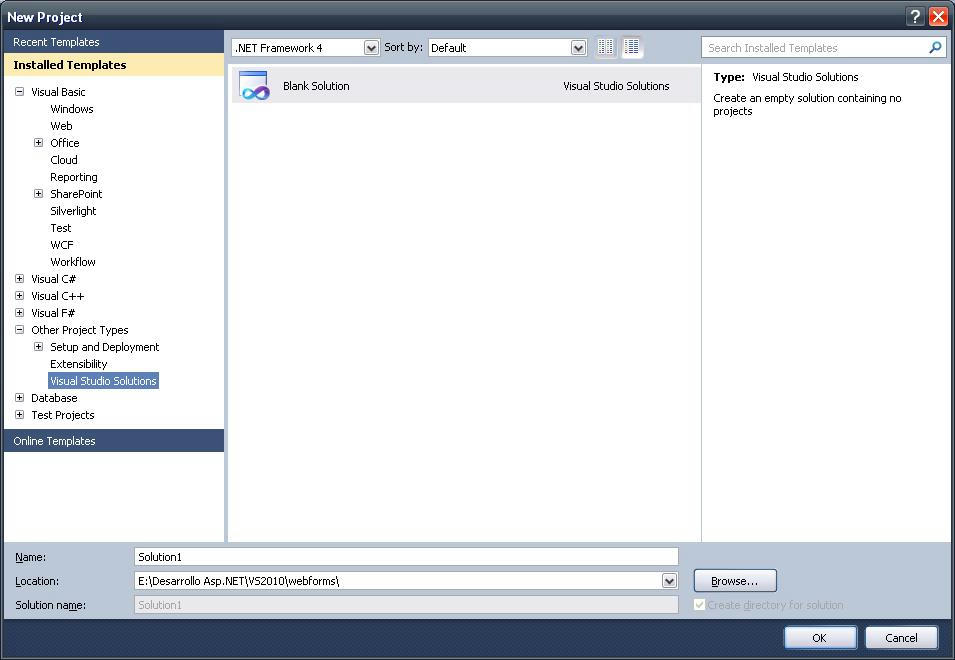
On the main tool bar go to File - New - Project then choose Other Project types and in there choose Visual Studio Solutions:
The steps to accomplish this go as follows:
On the main tool bar go to File - New - Project then choose Other Project types and in there choose Visual Studio Solutions:
Image may be NSFW.
Clik here to view.
Clik here to view.
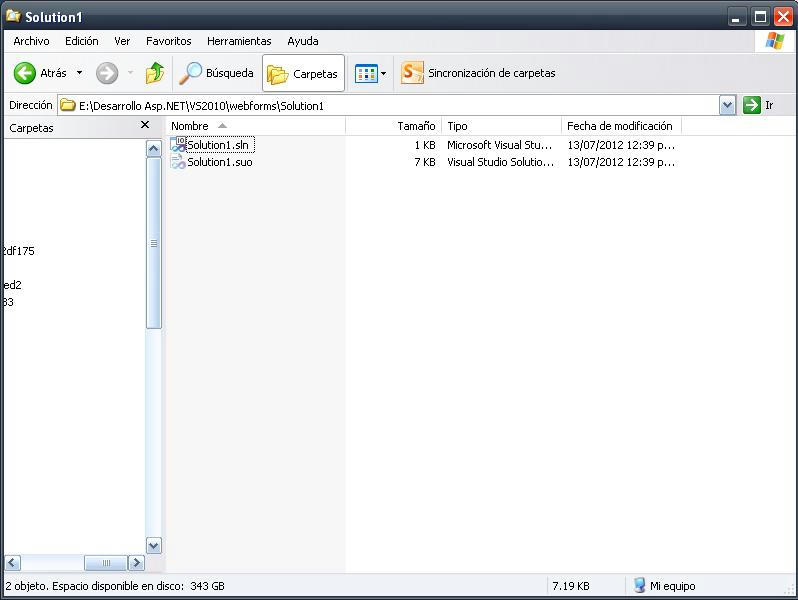
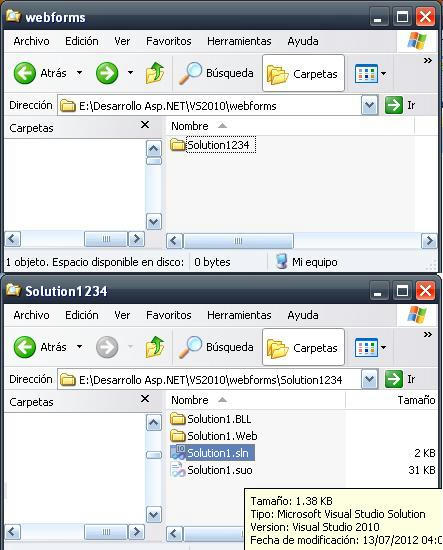
Name your solution as you wish and a folder with the same name will be created containing your main solution file, in this case our .sln file will be Solution1 and will result on the following structure:
Image may be NSFW.
Clik here to view.
Clik here to view.
From there is just a matter of adding the other new projects right on the main solution file. The name of the project can be part of a Namespace like organization for example Solution1 is the main namespace then the web project could be named Solution1.Web:
Image may be NSFW.
Clik here to view.
Clik here to view.

Note that the solution file won't be visible on solution explorer until you have two or more projects included to the main solution file:
Image may be NSFW.
Clik here to view.
Clik here to view.

For this on the main tool bar click on File - Add - New Project and choose for to add a Windows Class Project for example, the name will be named Solution1.BLL so it can conform part of the main namespace Solution1 as our already included web project did previously, don't forget to include the location of the project (folder Solution1) because this will be our main container:
Image may be NSFW.
Clik here to view.
Clik here to view.

Once this is done you will see the Solution file leading on for the next projects that are part of your main solution in this case Solution1 is conformed by Solution1.BLL and Solution1.Web projects:
Image may be NSFW.
Clik here to view.
Clik here to view.
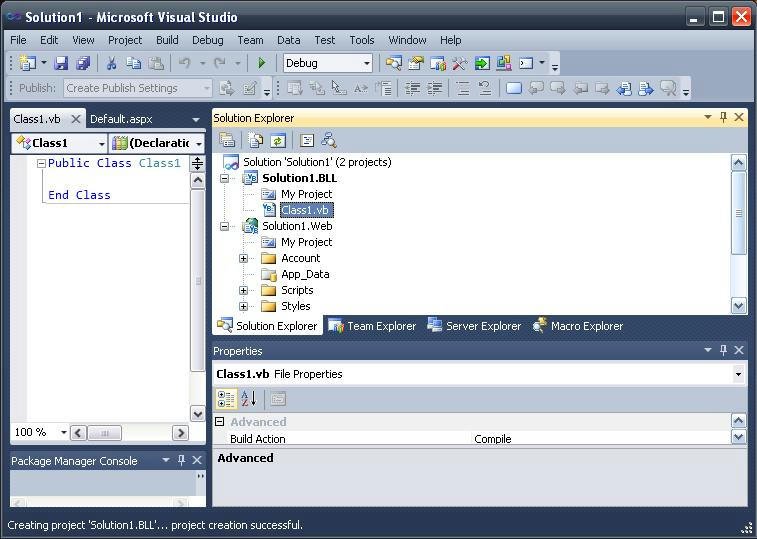
You can even change the name of the main solution container and it won't affect the way the solution and each of its members are opened. Try and change the name of it and direct click on the Solution.sln file, you will see that the Solution is opened normally:
In this way we have an optimized and organized structure that will make more efficient the management of our application for every possible component that is part of it.
If you have any questions or comments please let me know.
Cheers!
In this way we have an optimized and organized structure that will make more efficient the management of our application for every possible component that is part of it.
If you have any questions or comments please let me know.
Cheers!